To configure Digital Receipts (Idealpos Online/Idealpos Online Reporting required), complete the following steps:
Configure Digital Receipts in Idealpos - These are the steps that are required to enable Digital Receipts in Idealpos.
Configure the Digital Receipt Format in Idealpos Online - This step involves the customisation of the Digital Receipt Format that will be used to produce the Digital Receipts that are sent to Customers.
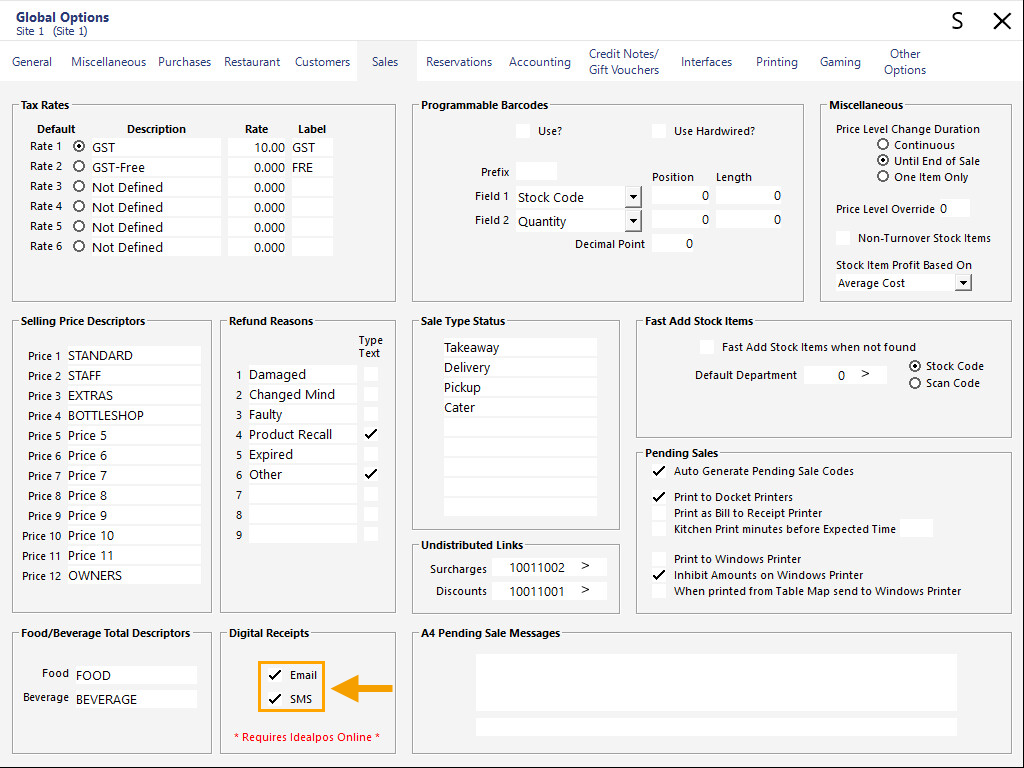
Go to: Back Office > Setup > Global Options > Sales.
Within the Digital Receipts section, toggle the following checkboxes as required:
Note!
SMS functionality is not currently available.
Enabling the option and attempting to send a digital receipt using SMS will not trigger a receipt to be sent via SMS.
Close the Global Options window, then go to: Back Office > Setup > Yes/No Options.
Search: "prompt to print".
Enable "Prompt to Print Receipt"
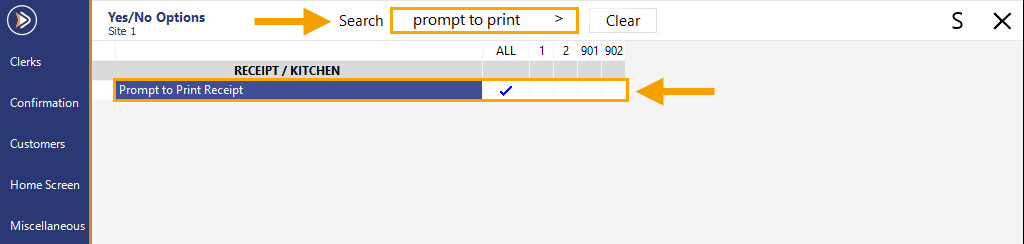
Close the Yes/No Options window.
A Receipt On/Off button must exist on the POS Screen so that receipts can be turned off to then enable the Digital Receipt prompt to appear.
To create a Receipt On/Off button, go to: Back Office > Setup > POS Screen > POS Screen Setup.
Select a POS Screen Layout > Buttons.
Select the desired POS Screen tab to create the button in, then select a blank POS Screen button and configure as follows:
Note!
The Button Caption will not be shown on the button but instead, pressing the button will trigger the caption to toggle between "RECEIPT IS OFF" and "RECEIPT IS ON".

Once configured, close the POS Screen Layout windows.
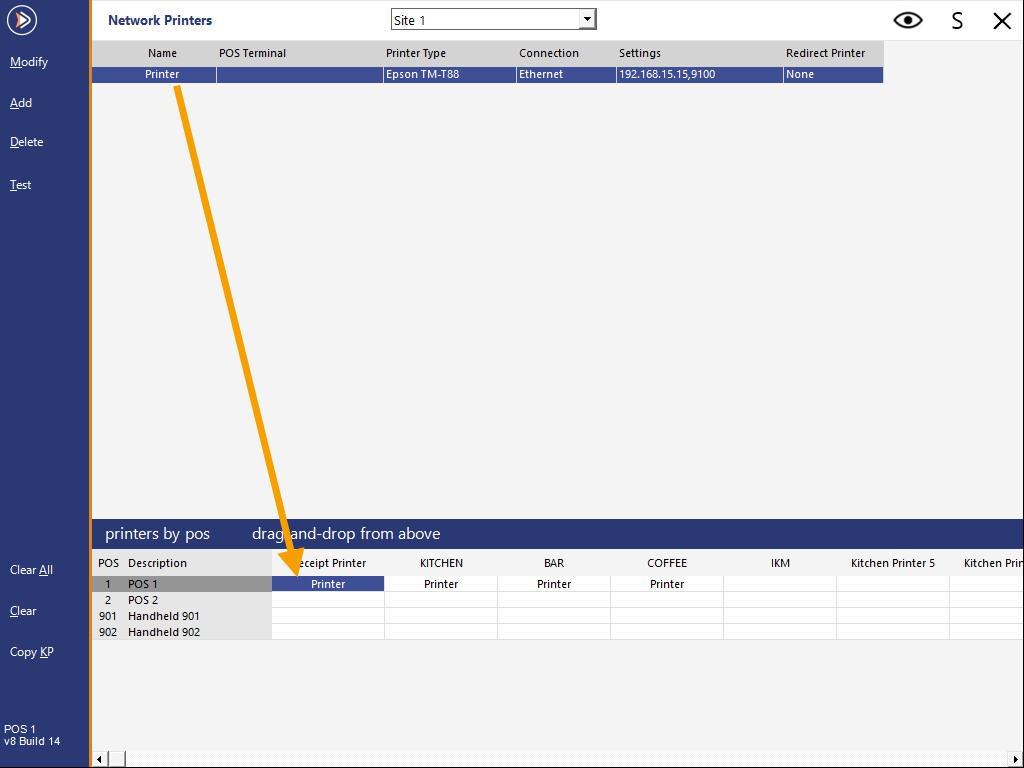
A receipt printer will also need to be configured so that if requested by a customer, the Print Receipt option can be pressed to produce a physical copy of the receipt.
Go to: Back Office > Setup > Network Printers.
Drag the receipt printer(s) to the required printer slots for the required POS Terminal(s).
If required, a printer can be added by pressing the 'Add' button on the top-left corner of the window, then configure the printer as required.
After creating the required printer(s), drag the printer entries into the required POS Terminal printer slots below.
Once the above steps have been completed (Digital Receipts enabled in Global Options, Y/N Option "Prompt to Print Receipt" enabled, the Receipt On/Off POS Screen button created and printers configured), the Digital Receipt Format needs to be configured. Refer to the next section below for further information.
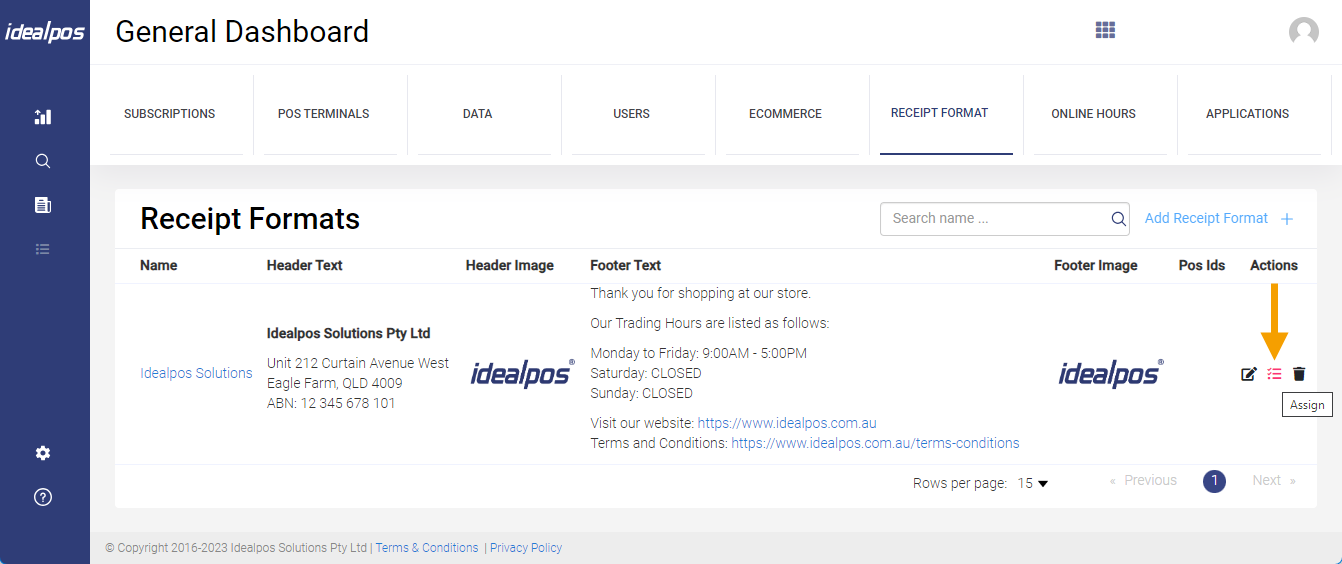
A Receipt Format needs to be customised in Idealpos Online before Digital Receipts can be sent.
The Receipt Format includes information such as the text content that appears in the header and footer, as well as the formatting of the text.
In addition, a Header Logo and a Footer Logo can be uploaded so that they will appear on the Digital Receipts.
To configure the Digital Receipt Format in Idealpos Online, go to: https://online.idealpos.com.au and login using your username and password.
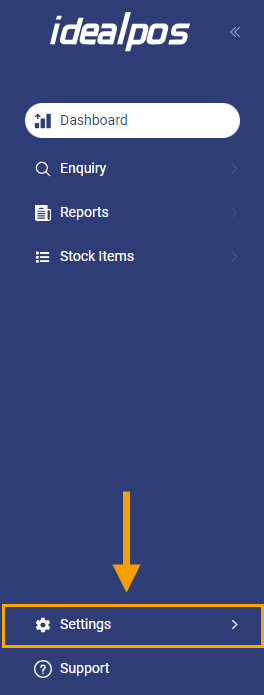
Once logged in, go to: Settings (bottom-left corner of the window > Settings).
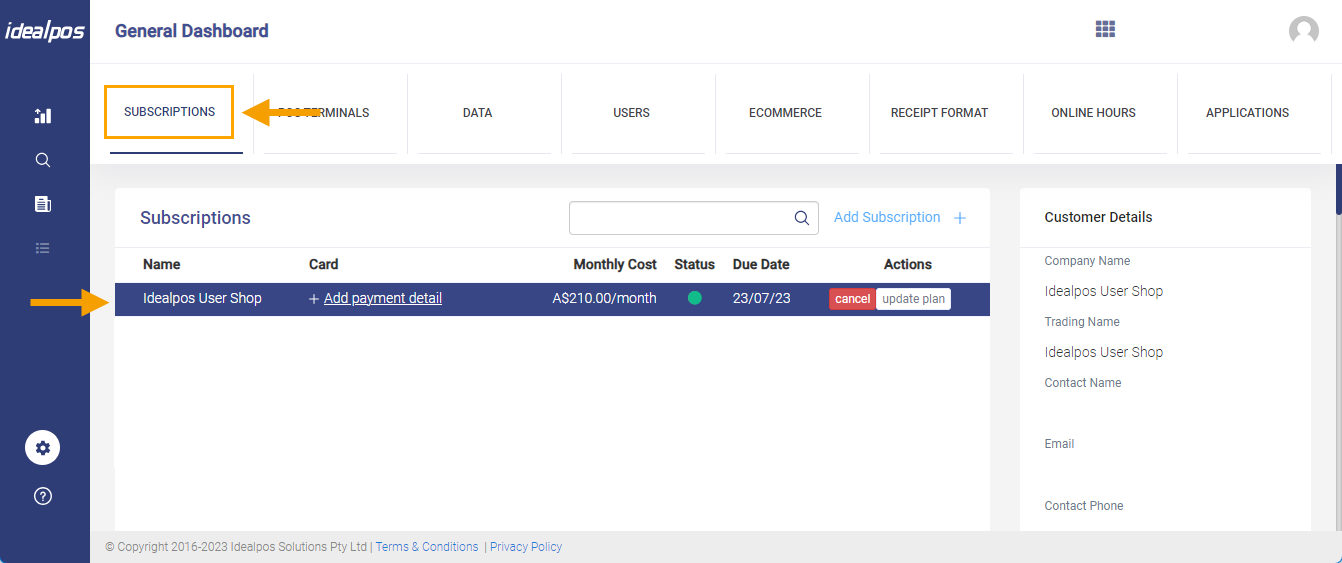
Within the "Subscriptions" tab, select the Subscription that contains the site with the POS Terminal(s) currently being configured.
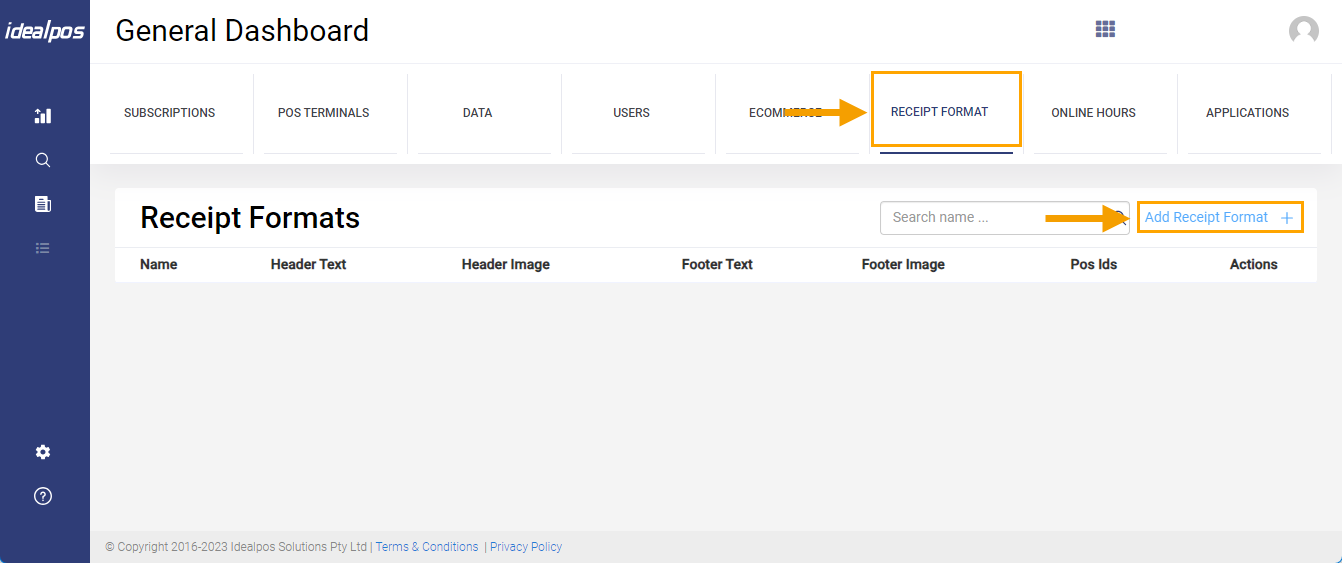
Go to the "Receipt Format" tab, then click on the "Add Receipt Format +" button.
This is where the Receipt Format can be customised for your Digital Receipt.
Name: Enter a Name for this Receipt Format (e.g. Standard Digital Receipt Format). The name can be used to distinguish different Receipt Formats.
Company Name: Enter a Company Name for this Receipt Format.
Header Logo Graphic Upload: Upload a graphic that will be displayed in the Header portion of the Digital Receipt.
Header: Format the Header of your Digital Receipt here. This is where the details about the venue can be entered such as the venue name, venue address, venue ABN and any other details that are required in the header portion.
Footer: Format the Footer of your Digital Receipt here. This is where you may want to list additional details such as trading hours, thank you salutations, Terms and Conditions, refund policies and any other details that should appear at the bottom of the receipt in the footer area.
Footer Logo Graphic Upload: Upload a graphic that will be displayed in the Footer portion of the Digital Receipt. It is not compulsory to have a footer graphic, however, you may want to include one if required.
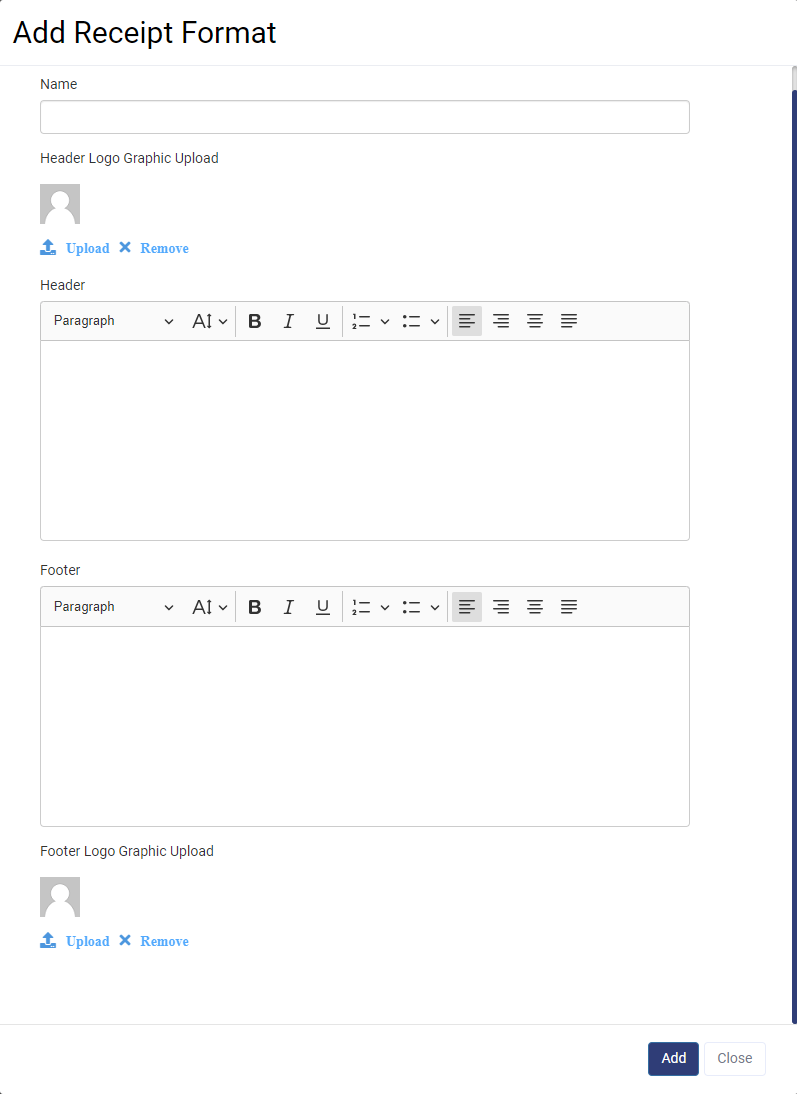
Once the desired Digital Receipt details have been entered, press the 'Add' button at the bottom-right corner of the window.
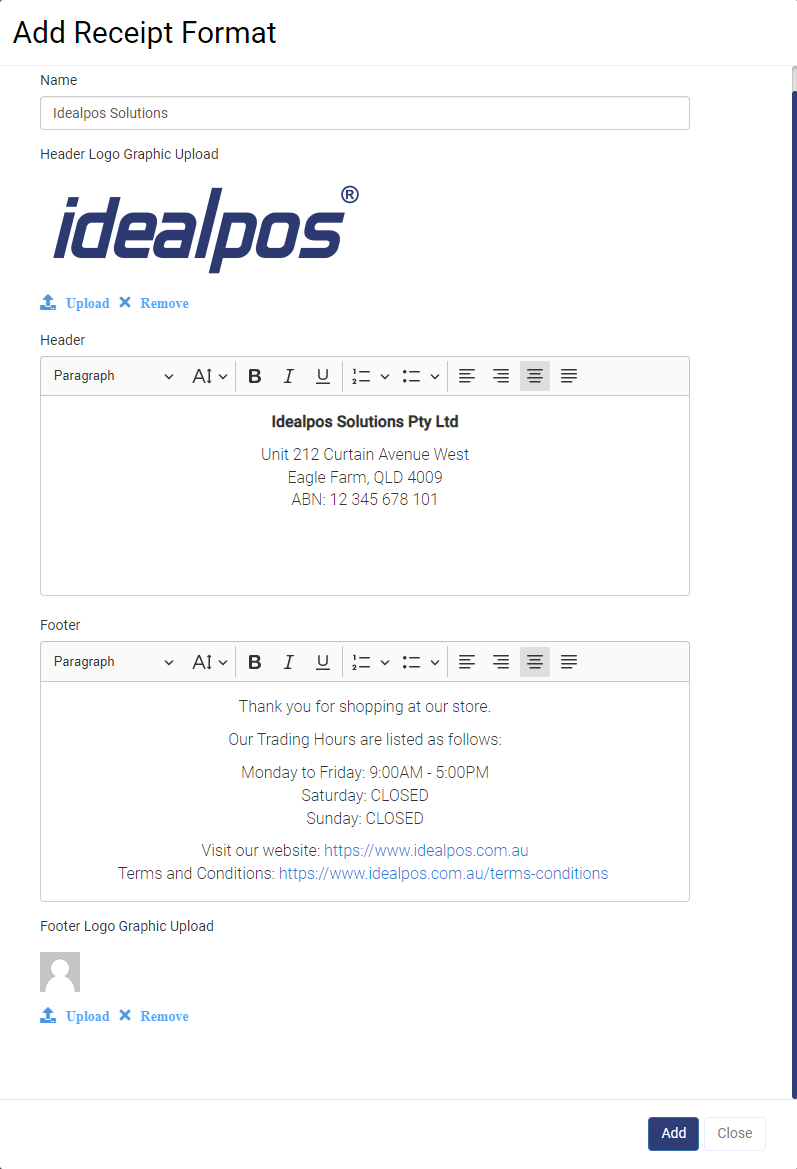
The below is an example of the 'Add Receipt Format' filled out with sample data.
The newly created Digital Receipt Format will now appear under the list of Receipt Formats.
The Digital Receipt Format will need to be assigned to the POS Terminals that will use the format.
Press the assign icon next to the Receipt Format as illustrated below to assign POS Terminals.
A list of POS Terminals for the selected Subscription will be displayed.
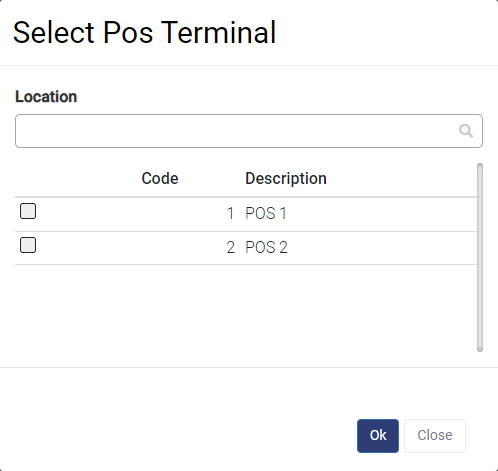
Enable the checkbox next to each POS Terminal that will use this receipt format > Press 'OK'.
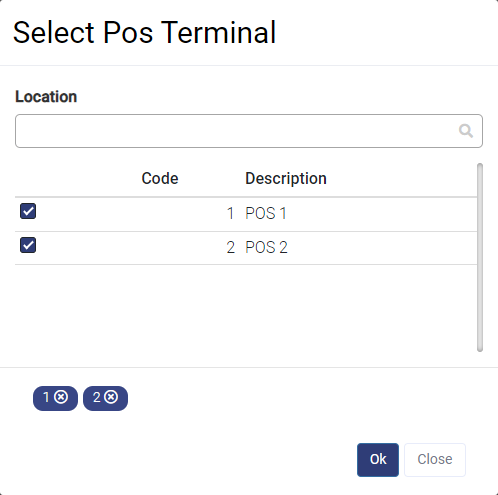
The POS IDs will now be listed next to the Digital Receipt Format, indicating that those POS Terminals have been successfully linked to the selected Digital Receipt Format.

If additional Receipt Formats are required, repeat the above steps to create the Digital Receipt Formats as required.
Note!
When multiple Digital Receipt Formats exist, a POS Terminal can only be linked to one Receipt Format at a time.
If a POS Terminal is linked to a secondary Receipt Format, it will simply become unlinked from the Receipt Format it was previously linked to.
The Digital Receipt function has now been configured and is ready for use.
Refer to the Send Digital Receipts page for more information on how to utilise this function.